Elegant Recipe Blog Documentation
Thank you for using our Elegant Recipe Blog Theme. Please read and follow the instructions. If you have any questions beyond the scope of this help file, you can submit a ticket.
Important Note:
Before beginning the installation process, please use the latest WordPress and Theme versions.
Getting Started
Let’s get started! First, ensure you have everything necessary to install the Elegant Recipe Blog.
Theme Requirements
Check the updates tab from your current WordPress dashboard to make sure you have the latest version of WordPress installed.
If you haven’t downloaded WordPress already, you can download it from the WordPress repository via WordPress download.
After you have the latest version of WordPress, download the theme ZIP file and save it somewhere handy on your computer. You will be using the included files for the rest of the installation process.
Theme Installation
Step 1: Upload and Activation
There are two methods for installing the Elegant Recipe Blog theme. You may either upload the zipped theme file using the WordPress theme installer (Recommended) or upload the unzipped theme folder via FTP (Advanced).
Method 1 ( Recommended): Install Using the WordPress Theme Installer
Log into your WordPress site and open the Administration Panel.
- Go to Appearance > Themes in the WordPress Dashboard
- Click on the Add New button.
- Click on the Upload Theme link.
- Click Choose File, select the elegant-recipe-blog.zip file from your computer, and click Upload. You can download the zip file from here: Elegant Recipe Blog.
- Click Install Now
Method 2: Install Using File Transfer Protocol (FTP)
- Unzip the “elegant-recipe-blog.zip” file on your computer.
- Login using the FTP client to access your host web server.
- Locate the wp-content folder in your WordPress install files.
- Upload the unzipped elegant-recipe-blog folder to the wp-content/themes folder.
For More Information about installing a theme using FTP, visit here.
Activate the theme
- Log in to the WordPress Administration Panel.
- Go to Appearance > Themes in the WordPress menu
- Hover over the theme thumbnail and click the Activate button.
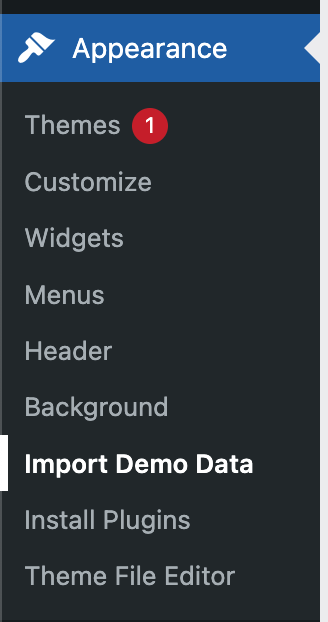
Import Demo Content
Go to Appearance/ Install plugin and install and activate the recommended plugins from there.
After installing and activating both plugins, Now go to Dashboard/ Appearance/ Import Demo Data. From there, you can import demo content for the Elegant Recipe Blog.
Home Page Setup like Demo
If you have imported demo content by following the above steps, you don’t have to follow these steps because the homepage page is already set to the demo.
Step 1: Go to Page and click on Add New.
Step 2: Enter the title (example: Homepage͟).On the right sidebar, you can find Page Attributes. On Template, please Select “Frontpage.”

Step 3: Click on Publish
Step 4: Now go to Settings > Readings. Choose A Static Page (Select Below). On the Home page, select the drop-down page you just created above and click on Save Changes.
Creating Recipes
Creating Recipes Documentation
Theme Options (For free version)
As mentioned in the above steps, you can use these options after setting up the home page.
Theme Options are
- Header Section
- Banner Carousel Section
- About Section
- Prefooter Section
Theme Options (For Premium Version)
As mentioned in the above steps, you can use these options after your homepage Homepage.
Theme Options are
- Header Section
- Banner Section
- Recipe Category
- Sidebar Recipe Section
- About Section
- Recipe Category 1
- Recipe Category 2
- Newsletter Section
- Instagram Section
- Prefooter Section
- Copyright Section
Posts
Creating posts
Step 1: Navigate to Posts in your WordPress admin sidebar.
Step 2: Click the Add New option to make a new post. Create a title, and insert your post content in the editing field.
Step 3: Select Post Format from the right side.
Step 4: Add categories from the right side. To assign a category to a post, check the box next to the category name.
Step 5: Add tags from the right side. Type the tag name in the field, separating multiple tags with commas.
Step 6: you can add a featured image. To do so, click the featured image box, select an image, and click the set featured image button.
Creating Menu
Step 1: Go to the backend. Click Appearance > Menus.
Step 2: Enter Menu Name. And assign a menu.
Step 3: Click on Create Menu.
Step 4: Now, at the bottom, you can find Menu Setting with auto-add pages and display location. Click on Primary Menu and click on Save. Now, view the home page for the menu home page.
Site Identity
To set up Site Identity,
- Go to Appearance> Customize> Default Settings > Site Identity
- Click Select logo by clicking Select Logo.
- Upload and select the desired image.
- Enter the Site Title and Tagline
- Check Display Header Text for the Site title and Tagline to appear on the homepage.
- Click Select home page on the Site Icon.
- Upload and select the desired image. (The Site Icon/ favicon is used as your site’s browser and app icon. The recommended Site Icon size is 512*512 pixels.)
- Click Save & Publish.
Colors
- Go to Appearance> Customize> Colors
- Change the Header Text / Background Color by clicking the Select Color button.
- Click Save & Publish.
- Theme Color Option is only available in the Premium Version of the theme